
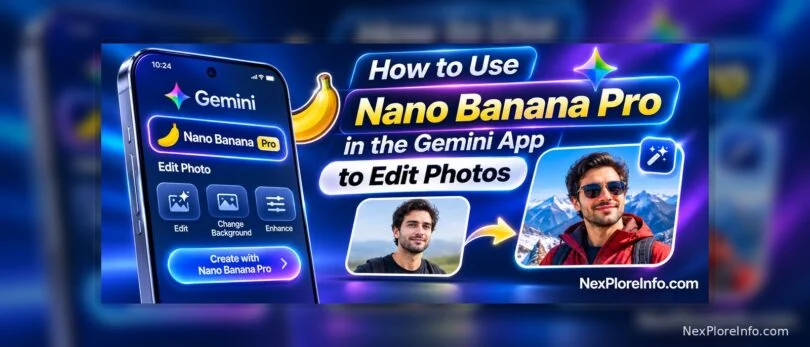
Google’s Nano Banana Pro is the upgraded image model built into the Gemini app, and it can do things the original Nano Banana just can’t, like rendering whole paragraphs of readable text, blending more than a dozen reference photos into one scene, and outputting sharp 4K files. It’s not a separate app you have to download. It’s a setting you switch on inside Gemini.
Quick answer: Open the Gemini app, tap the tools menu, choose Create images, then pick the Thinking model instead of Fast. That one switch is what turns on Nano Banana Pro instead of the older model. From there you can type a prompt, upload up to 14 reference photos to blend together, and pick 2K or 4K output before you hit generate.
In this article 11 sections
- Before You Start
- Nano Banana Pro vs. the original Nano Banana
- Where you can already use Nano Banana Pro
- How to turn on Nano Banana Pro in the Gemini app
- How to blend multiple photos into one image
- How to choose 2K or 4K resolution
- How to build infographics with real, live data
- Free vs. paid: what each Gemini plan gets you
- Common Problems and How to Fix Them
- Tips for getting better results from Nano Banana Pro
- FAQs
Before You Start
- A Google account signed into the Gemini app on the web or on iOS/Android.
- No separate download or subscription is required to try Nano Banana Pro. Free accounts get a limited number of generations per day before the app quietly switches back to the standard model.
- If you plan to blend several reference photos, have those images ready on your phone or computer before you start the chat.
Nano Banana Pro vs. the original Nano Banana
Nano Banana Pro runs on Gemini 3 Pro, Google’s more capable image model, while the standard Nano Banana still uses the faster Gemini 2.5 Flash Image model. Google first introduced Nano Banana Pro as an official upgrade to its image generation tools, and in its own announcement post the company described it as built for sharper text, better lighting, and more accurate real-world detail than the original model. The Pro version trades a bit of speed for noticeably better accuracy, resolution, and control over the final result.
| Feature | Nano Banana | Nano Banana Pro |
|---|---|---|
| Underlying model | Gemini 2.5 Flash Image | Gemini 3 Pro Image |
| Best for | Quick, casual edits | Detailed, polished results |
| Reference photos you can blend | A few at a time | Up to 14, including up to 5 people kept consistent |
| Maximum resolution | Standard | Up to 4K |
| Text rendering | Short, basic text | Long paragraphs, multiple languages, translation |
| Real-world data in images | Not supported | Yes, pulled live through Google Search grounding |
| Where to find it | Default “Fast” model | Gemini app “Thinking” model, AI Studio, NotebookLM, Workspace, AI Mode in Search |
Where you can already use Nano Banana Pro
Nano Banana Pro isn’t locked to one app. Since the model rolled out, Google has steadily folded it into more of its products, and the company keeps an updated list of where to find it across its lineup. Here’s everywhere it currently shows up.
- Gemini app on the web and on mobile, available globally under the Thinking model
- Google AI Studio and the Gemini API, for developers building their own tools
- NotebookLM, inside its Slide Decks and Infographics features
- Google Slides and Vids for Workspace users, through the “Help me visualize” and “Beautify this slide” options
- AI Mode in Google Search, in supported countries for signed-in users
- Flow, Google’s AI filmmaking tool, on paid plans
- Google Ads, for brands building ad creative
How to turn on Nano Banana Pro in the Gemini app
You don’t need a separate download or a hidden setting. The whole process happens inside a normal Gemini chat.
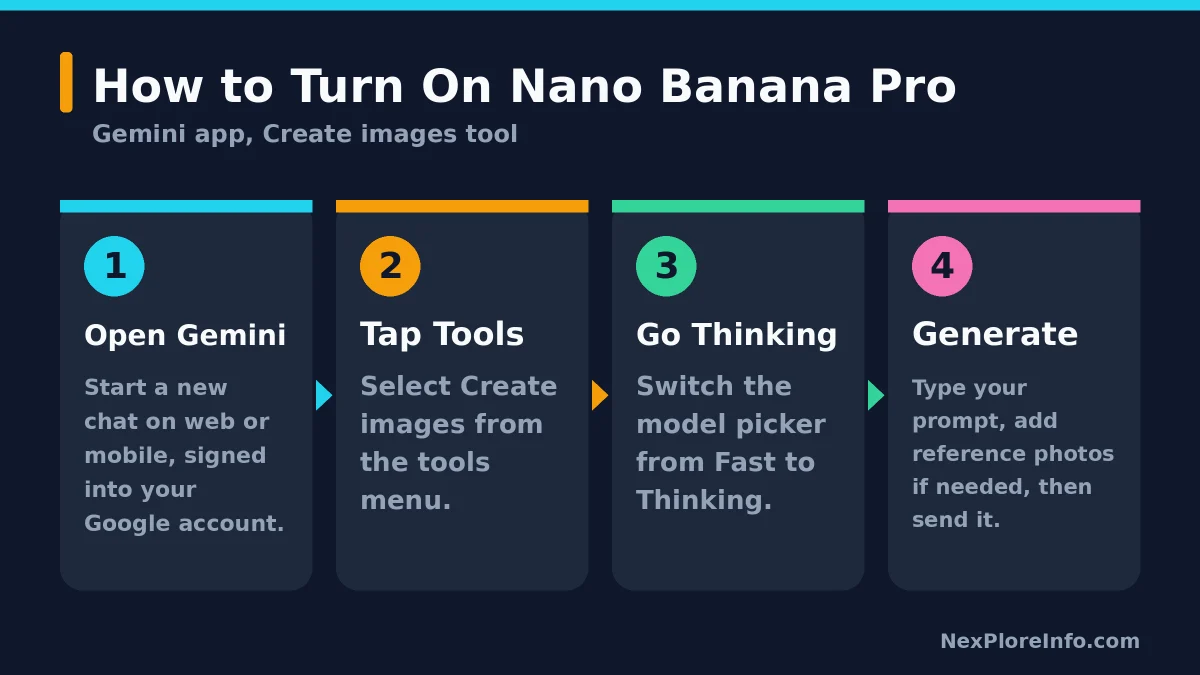
- Open Gemini on the web or in the mobile app and start a new chat.
- Tap the tools icon and select Create images.
- Switch the model picker from Fast to Thinking. This single tap is what actually loads Nano Banana Pro instead of the standard Nano Banana model.
- Type a detailed prompt describing exactly what you want, including any text you need rendered inside the image, word for word.
- Send the prompt and wait a few extra seconds. Thinking mode plans the composition before it draws anything, so it’s noticeably slower than Fast, but the payoff is a far more accurate result.
How to blend multiple photos into one image
One of the biggest upgrades in the Pro version is how many source images it can combine at once, and how well it keeps people looking like themselves.
- Open a chat and tap the plus or attach icon next to the text box.
- Upload your reference photos. You can add up to 14 images in one request, and the model can keep up to 5 different people recognizable across the final result.
- Describe exactly how the photos should come together, for example asking it to place two people from separate photos into the same outdoor scene with matching lighting.
- Look over the output and ask for specific tweaks rather than starting over. Nano Banana Pro handles follow-up edits to the same image well.
How to choose 2K or 4K resolution
Higher resolution is one of the clearest reasons to pick Nano Banana Pro over the standard model, and it’s built right into the generation flow rather than being a separate export step.
- Write your prompt as usual with the Thinking model selected.
- Look for the resolution option in the image settings before you generate. Standard output is the default, with 2K and up to 4K available as alternatives.
- Choose the higher resolution if you plan to print the image, use it as a banner, or crop into it later. Lower resolution is fine for quick social posts and generates faster.
Keep in mind that larger files take longer to generate and can use up your daily quota faster than standard-resolution images, so save 4K requests for images you actually need at that size.
How to build infographics with real, live data
Nano Banana Pro can pull current information through Google Search grounding and lay it out visually instead of just generating a picture from imagination.
- Ask for an infographic about a topic that involves real facts, like “build an infographic showing today’s weather forecast for this week” or a step-by-step recipe card.
- Nano Banana Pro checks Search for the current numbers or facts before generating the layout, so the figures reflect what’s actually happening right now rather than outdated training data.
- You can also hand it messy handwritten notes and ask it to turn them into a clean diagram or chart.
This is useful for quick explainer graphics, travel itineraries, or recipe cards you want to save and reuse, and it’s a feature the original Nano Banana simply doesn’t have.
Free vs. paid: what each Gemini plan gets you
Nano Banana Pro is available to free Gemini users, just with tighter limits than paying subscribers.
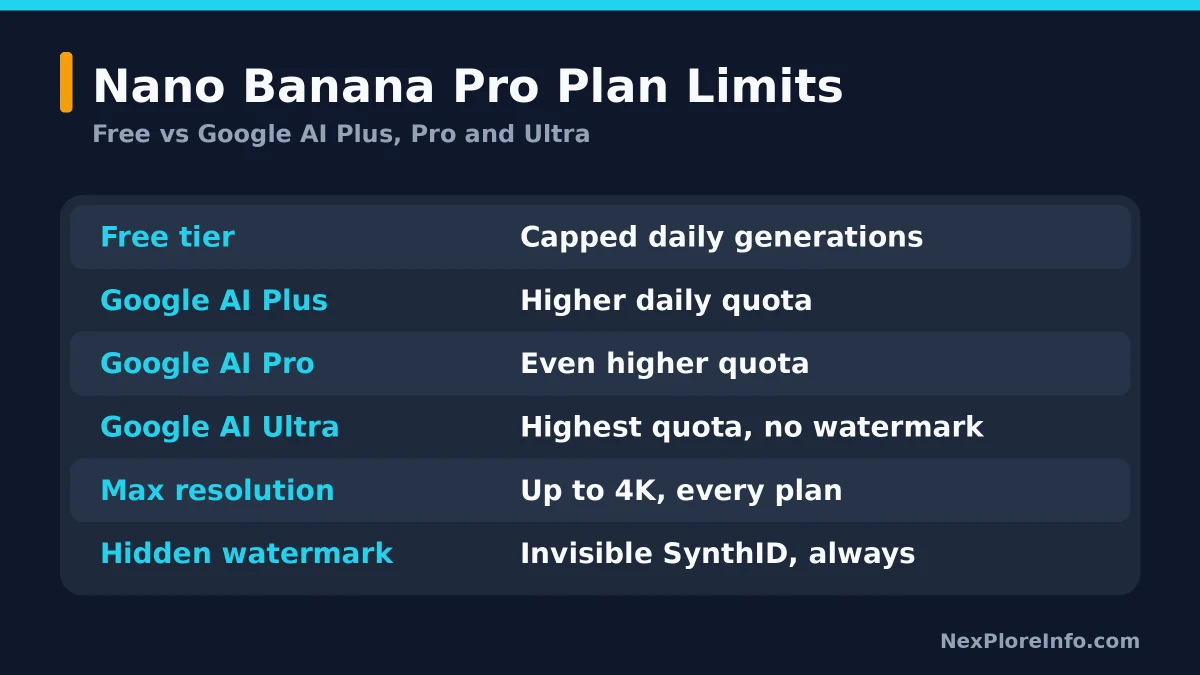
- Free tier: You get a limited number of Nano Banana Pro generations. Once you use them up, the Gemini app quietly falls back to the original Nano Banana model for the rest of the day rather than blocking image generation entirely.
- Google AI Plus, Pro, and Ultra subscribers get higher daily quotas for Nano Banana Pro, so heavy users or anyone editing images for work will likely want a paid plan.
- Google AI Ultra is the only consumer tier where the visible Gemini watermark is removed from the finished image. Free, Plus, and Pro users will see a small sparkle watermark in the corner.
Every image Nano Banana Pro generates, on any plan, carries an invisible SynthID watermark that identifies it as AI-generated. You can check whether an image was made with Google AI by uploading it back into the Gemini app and asking directly.
Common Problems and How to Fix Them
Most Nano Banana Pro hiccups come down to a few repeatable causes. Here’s how to clear the most common ones.
- The model picker only shows “Fast,” not “Thinking.” This usually means you’re looking at the wrong menu. Make sure you tapped the tools icon and selected Create images first, since the Thinking toggle lives inside that flow rather than the main chat settings.
- Generation suddenly looks like the old, lower-quality Nano Banana. You’ve likely hit your daily Nano Banana Pro quota on a free account. The app doesn’t show an error, it just quietly falls back to the standard model for the rest of the day. Check back tomorrow or consider a paid plan if this happens often.
- Uploaded reference photos aren’t being blended correctly. Keep each photo reasonably high resolution and well lit, and describe in your prompt exactly how the people or objects from each photo should interact. Vague prompts like “combine these” give the model less to work with than specific staging instructions.
- Text inside the generated image is slightly off. Re-check your prompt for the exact wording you asked for, in quotes if possible, and try regenerating rather than manually editing the image afterward. Nano Banana Pro handles a second attempt at text better than a patch job.
- 4K option isn’t appearing. Resolution settings sit inside the image generation panel itself, not in your general Gemini account settings, and some regions or account tiers may see it roll out slightly later than others.
Tips for getting better results from Nano Banana Pro
A few habits separate a flat, generic result from one that looks genuinely considered.
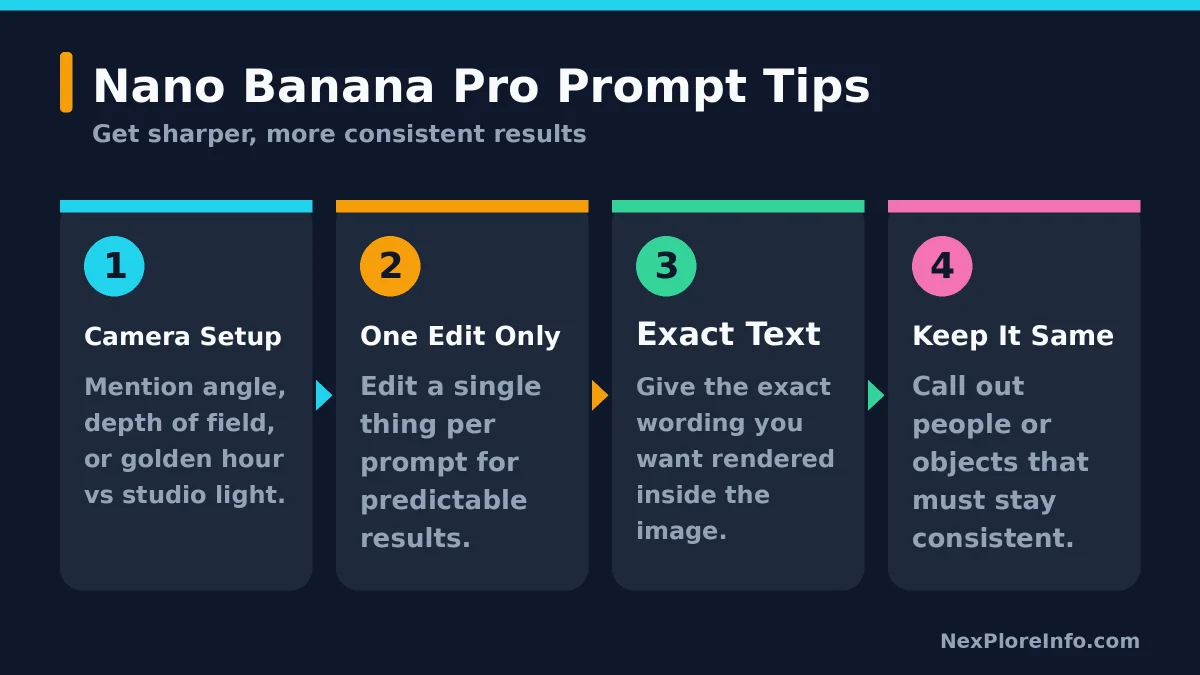
- Be specific about camera and lighting. Nano Banana Pro understands studio-style direction, so mention the camera angle, depth of field, or whether you want “golden hour” lighting versus a flat studio look.
- Ask for one change at a time when editing an existing image. Piling several unrelated edits into a single prompt makes the result less predictable.
- Spell out any on-image text exactly. Since Nano Banana Pro can render long paragraphs accurately, give it the precise wording you want rather than a vague description.
- Name the people and objects you want kept consistent across a set of images, especially when blending multiple reference photos together.
If you want a different kind of AI image tool entirely, NexPloreInfo also covers the best AI image generators worth trying this year, and if prompting still feels unfamiliar, this simple framework for writing better AI prompts works for image tools as well as chatbots. For other recent additions to Google’s AI lineup, see how to use Gemini 4 Argon and how to get started with NotebookLM, Google’s AI-powered notebook that now uses Nano Banana Pro for its own slide decks and infographics.
FAQs
What is Nano Banana Pro?
Nano Banana Pro is Google’s upgraded AI image model, officially called Gemini 3 Pro Image. It generates and edits pictures with sharper text rendering, higher resolution, and the ability to blend far more reference photos than the standard Nano Banana model.
Is Nano Banana Pro free to use?
Yes, with limits. Free Gemini users get a capped number of Nano Banana Pro generations per day. After that, the app automatically switches back to the original Nano Banana model rather than stopping you from creating images.
What’s the difference between Nano Banana and Nano Banana Pro?
Nano Banana is faster and runs on Gemini 2.5 Flash Image, good for quick casual edits. Nano Banana Pro runs on Gemini 3 Pro Image and is built for detailed, professional-looking results, including 4K output, better text, and real-world data pulled through Search grounding.
How many photos can I blend with Nano Banana Pro?
Up to 14 reference images in a single request, and it can keep as many as 5 different people looking consistent across the final image.
Can I get 4K images with Nano Banana Pro?
Yes. Nano Banana Pro supports resolution options up to 4K, selectable in the image settings before you generate, in addition to standard and 2K output.
Does Nano Banana Pro add a watermark to images?
Every image carries an invisible SynthID watermark that marks it as AI-generated. Free, Plus, and Pro users also see a small visible Gemini sparkle watermark, which is only removed for Google AI Ultra subscribers and in Google AI Studio.




Leave a Comment